Lighting in Unreal Engine is a pain. Not that it’s terrible, but it’s difficult to know what to use and how to use it. You have lots of things like Lumen, reflections, shadows, distance fields, etc.
The first thing to understand is that direct lighting is only done one way. So whether you turn Lumen on or off, it doesn’t matter for direct lighting. That’s the easy part.
Next is shadows. If you use Lumen, you turn on Virtual Shadow Maps and you’re done. Only lights that are set to stationary or movable will be used. These are dynamic lights and shadows are created in real time.
If you don’t use Lumen, you can still use Virtual Shadow Maps for dynamic lights. But you can bake static shadow maps for static and stationary lights (on static actors).
Let me stress this. LUMEN DOES NOT DO DIRECT SHADOWS!!!
If you look at scalability settings for global illumination settings, Lumen is used for Epic and High settings. Lumen is turned off for Medium and Low settings.
So far, none of this has anything to do with global illumination. Global illumination is what happens with secondary bounces of light rays. So if you don’t use Lumen, baking lighting will also generate these secondary bounces and bake them into shadow maps for static actors. You won’t get anything with movable actors unless you use Lumen or fake it somehow with Ambient Occlusion maps (more on that later) or use screen space global illumination.
Secondary light bounces are what causes a room to be lit up even though there is no direct light inside. The light comes in through a door or window and residual light bounces will make it so you can still see inside the room. This is where Lumen really shines (pun may or may not be intended). And because secondary bounces can be blocked by meshes, you get secondary shadows for “free” with Lumen. So Lumen CAN do shadows, just not direct lighting shadows. And I’ve seen professionals in Unreal Engine try to tweak Lumen settings to try and get better direct shadows.
Another thing to know about Lumen is that it uses distance fields. What are distance fields? They’re like coarse voxel representation of your scene. It does traces against these voxels for secondary lighting. It also uses these for reflections (more on this later as well).
Is it getting complicated yet? We’re not even close to halfway done.
If you’ve ever used spline meshes, these don’t work with Lumen because spline meshes don’t create distance fields. Why? Because the mesh is distorted on the GPU. So on the CPU side, it has no clue where the mesh actually is and distance fields are turned off internally. You can still get some global illumination but it likely won’t be accurate.
One thing I really wish I knew before is that Lumen has a range. There’s a setting for this range. So what happens beyond this range for secondary light bounces? It uses screen space global illumination. IOW, only what can be seen on screen will cause secondary light bounces. So as things move off screen, you’ll see secondary shadows suddenly disappear. You can see some popping or flickering of object brightness.
But this too has a range. What happens beyond this range? Then indirect lighting simply turns off.
If you have hardware raytracing and you have built HLOD, you can greatly extend the range that Lumen will work in by enabling Far Fields. I’m not getting into HLOD here as that’s a topic of its own.
If you don’t use Lumen, there is also a Lightmass Importance Volume for indicating which area is more important. But what about indirect lighting on movable objects? For that, you have to use screen space global illumination. It will only use what is on screen. It actually looks decent. But it’s limited in what it can do and is prone to visual popping as things move off screen.
There’s a lot more to all of what was mentioned above, but we’ll move on to reflections.
Reflections are a complete disaster in Unreal Engine. Avoid reflections like the plague if you can in Unreal Engine. I made the mistake of thinking reflections worked. They don’t.
Lumen will do its own reflections. They’re bad. They’re blurry, out of focus and just horrible. You can turn on something called “Screen Traces”. These look AMAZING… when it works. It doesn’t work on any Niagara effects. And it doesn’t work on anything translucent. There are some special cases where it will kind of work, but only on one side… and that’s kind of useless if it’s translucent.
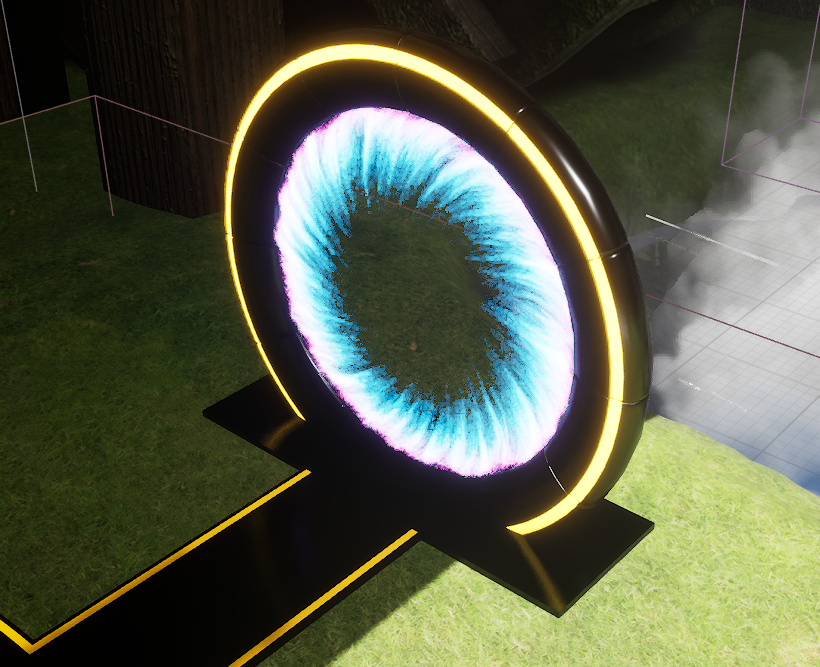
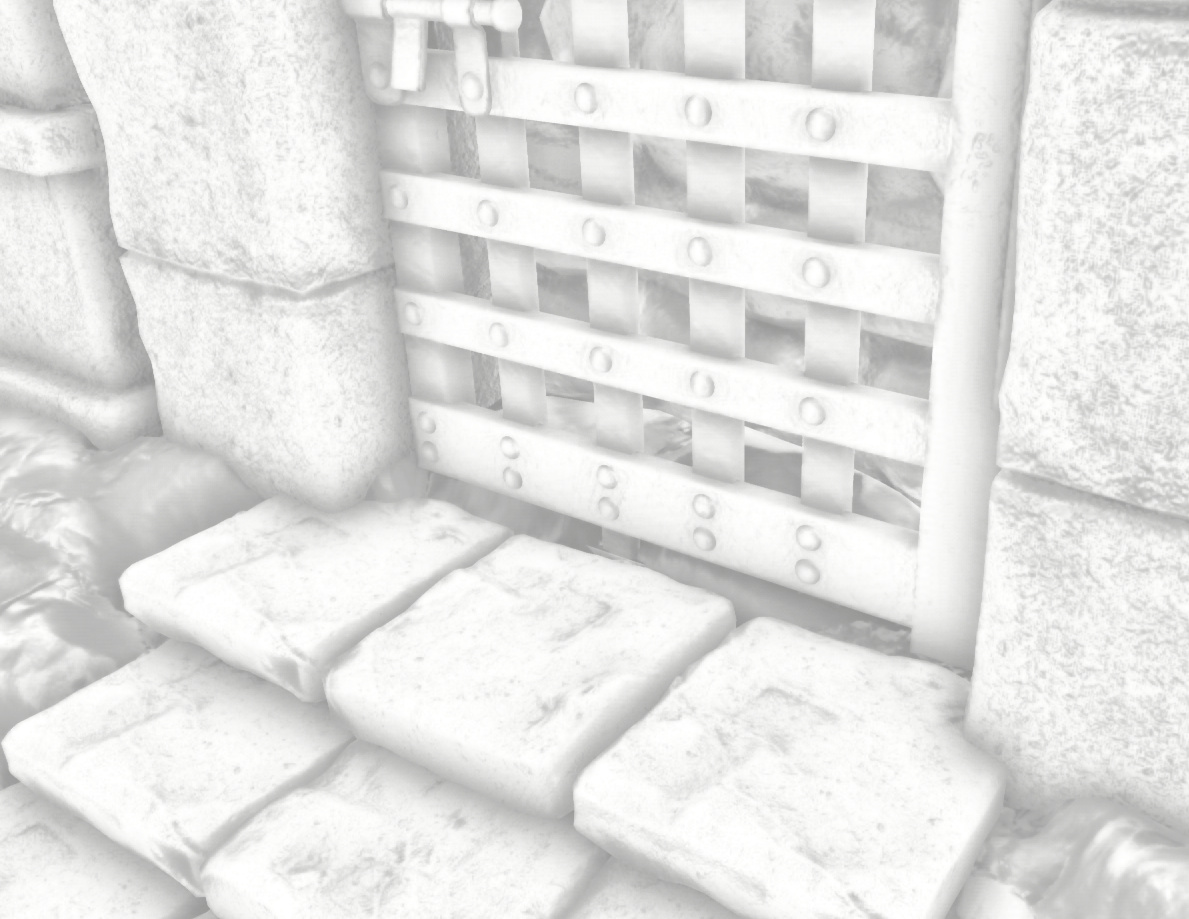
In my game, I have a gate with a niagara effect in the middle. So how do I get reflections of the niagara effect if you use Lumen? I had to get my niagara effect to write to a render texture. Then I have a reflection plane with a material that can take this render texture and draw it at the appropriate location to make it look like a reflection. Use this as a decal so that it gets drawn only on specific actors. It requires a LOT of setup and it doesn’t look all that great.
This is a Lumen reflection. Notice the lack of reflection for the niagara effect. Yet the yellow/orange emissive ring is reflected. (And yes, I’m thinking of redoing the gate asset, but this is good as an example)
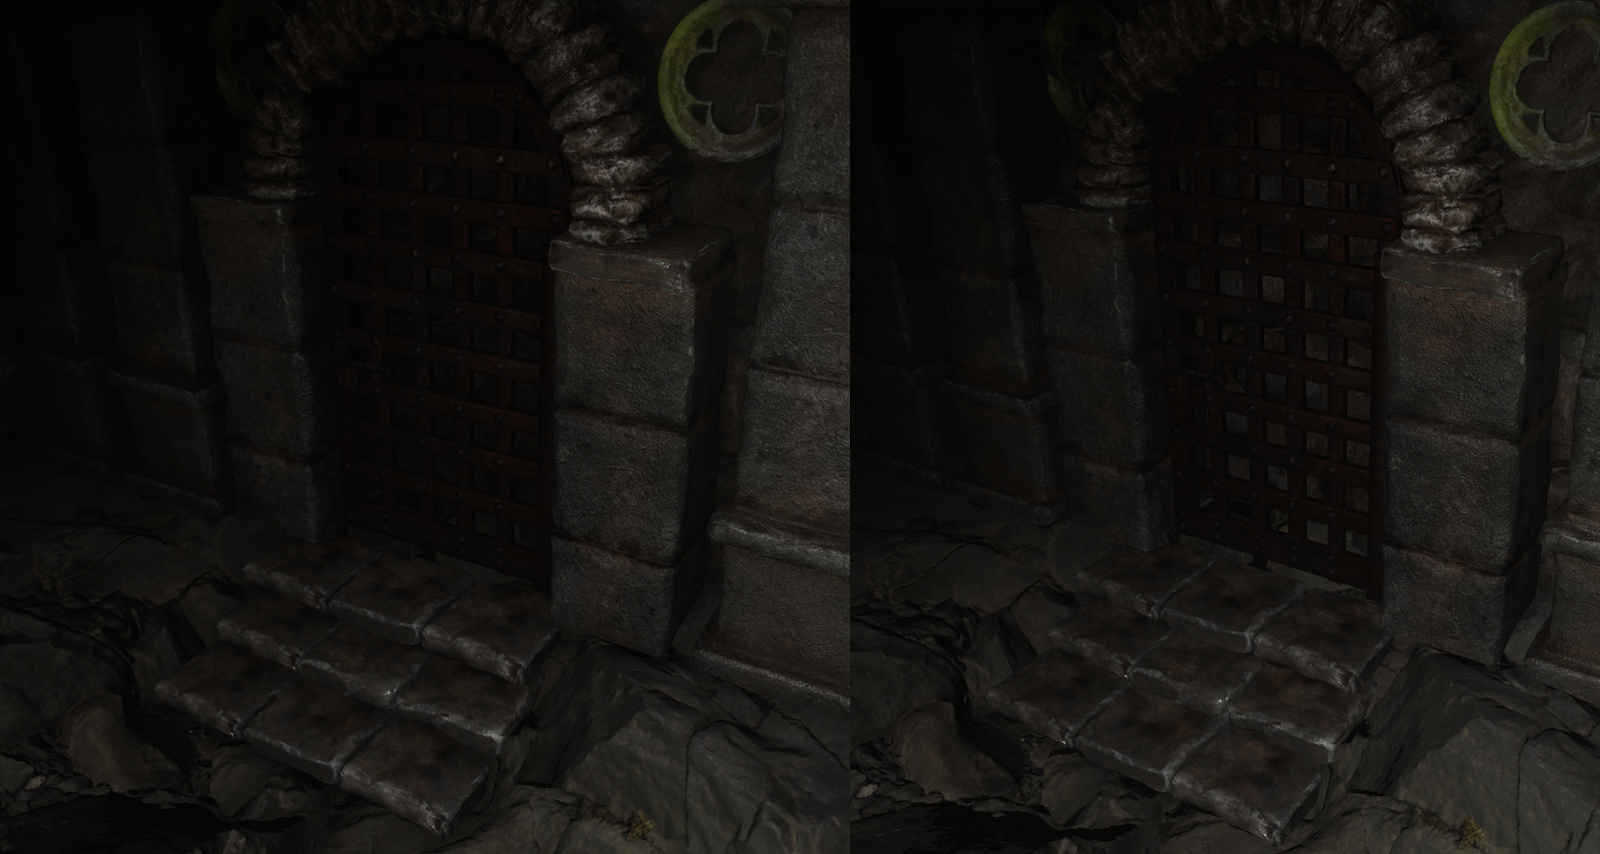
Here it is with a proxy reflection. This is a nightmare to do. Don’t do this if you can avoid it.
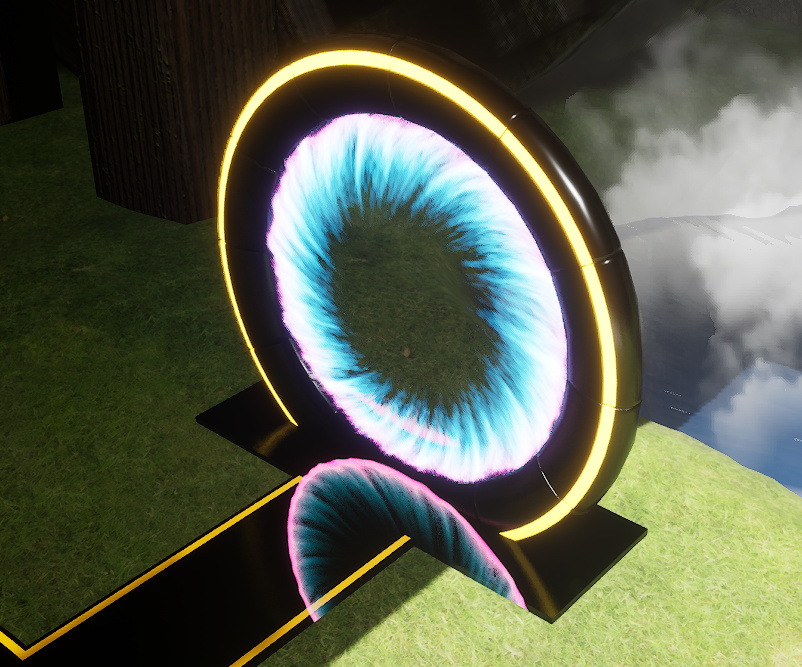
One thing you’ll notice is that the purple area is way to strong. This is because that area is actually inside the ring when looking at the main (non reflected) asset. I could probably clip the ring or something, but I can’t be bothered.
In any case, what the above image is showing is a flat plane on the ground set up as a decal that renders the render texture in real time at the right location.
But if you don’t care for translucent assets to be reflected, Lumen with screen traces is the way to go.
Finally, what happens if you don’t use Lumen? How do you do reflections then? Well, you have 3 options that can all work together.
First, you can use Screen Space Reflections. This is available with Lumen BTW. But the problem is that this looks HORRIBLE!!! It’s even worse than Lumen reflections when it comes to, well, anything. Not just translucent objects, but everything looks bad. It has a tendency to do streaks as well. Like this:
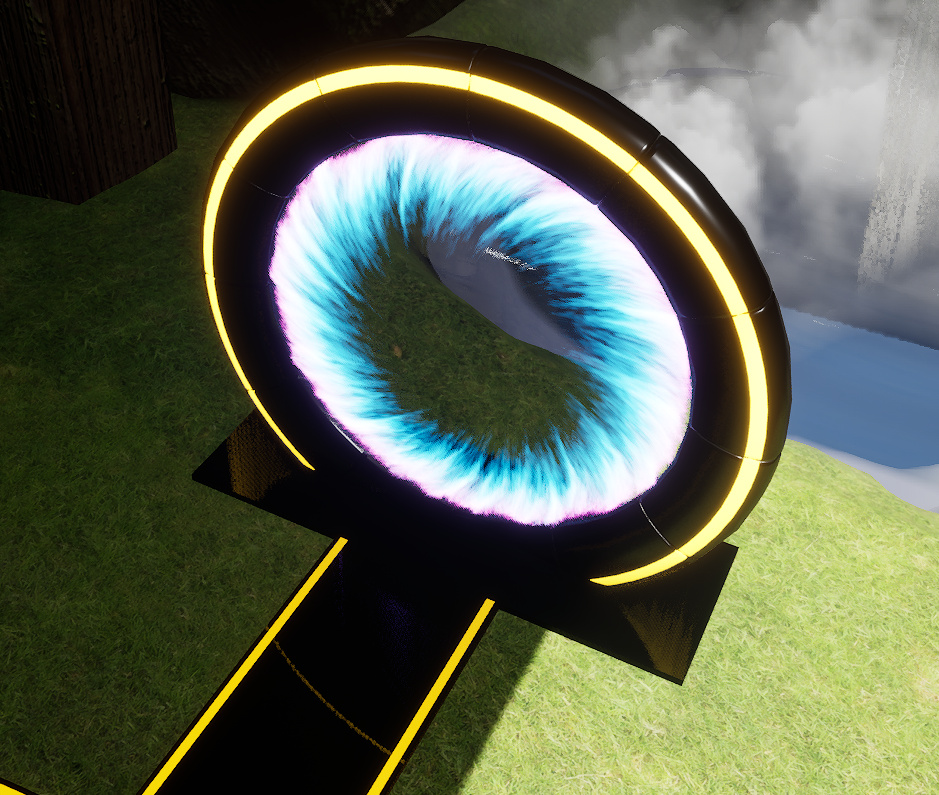
What is that even? You can see the yellow/orange ring is completely distorted. And while the niagara effect isn’t seen in the reflection, it isn’t because it isn’t being reflected. It is. It’s just the distortion is so great that it’s no longer on screen. I just couldn’t find a way to display it, but it will at times render. And it is HORRIBLE!!! It is completely distorted and streaky. You can’t even tell what it is.
Said plainly, screen space reflections just don’t work… for anything.
Second option is for static scene. You can use reflection captures all over your scene and they will show up in any reflective surface. Doesn’t work with movable object though I think it may be possible to have these update every frame. But they’re very costly to update. They will tank your framerate if you use them this way. For a static scene, they’re free and they look great. The only downside is that they only reflect semi far away objects. They don’t reflect objects beyond it’s attenuation radius. And they don’t reflect anything close to a reflective surface. They’re great to just make something look like metal for example, but not for actual reflections where you need to see what’s there. For example, you can’t reflect the ground with these captures because the ground is way too close. However, something in the sky could reflect the ground because it’s far enough away.
So how do you get close up reflections? There is a way. These are reflection planes. These are incredible! They look perfect. But they render the whole scene again for each reflection plane you use. Just by adding one, this can cut your framerate by half. But in practice, all the assets are already on the GPU, so the cost isn’t as high as that. These also support only rendering objects in a list. In my case, I have a reflective door and only want to reflect the ground and some tiles in front of it. I add those objects to the list and I have perfect reflections. You can also render at reduced screen size for even faster performance.
These are great!!! I wish I knew about these a LONG time ago.
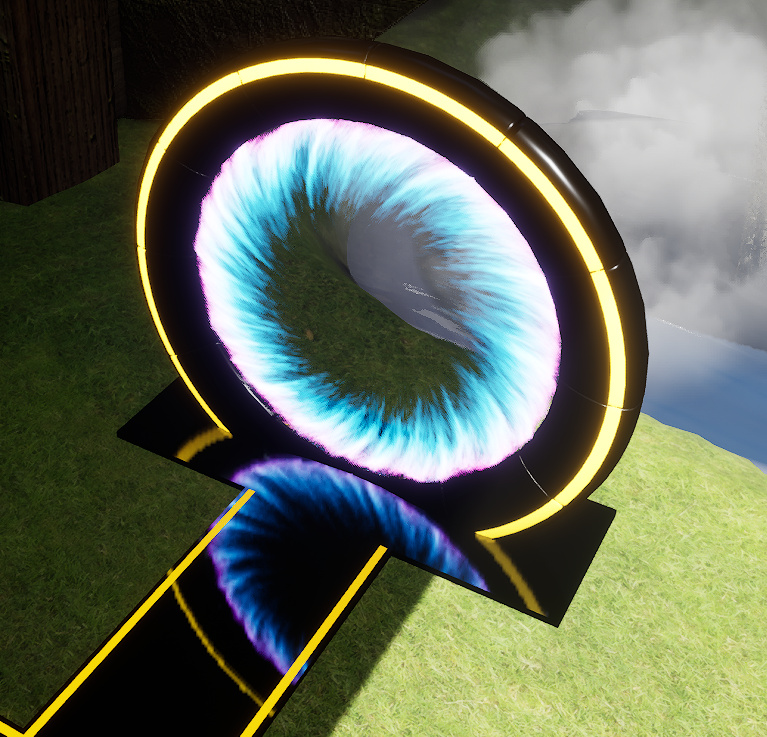
These reflection planes update in real time and render the whole scene (or the list you provided). So it’s not limited to what’s on screen. And setting them up is quick and easy. Oh, and they work with EVERYTHING!!! Niagara, emissives, everything!
What’s really annoying is that none of the reflection captures work with Lumen. Only Screen Space Reflections work with Lumen and those are garbage.
Here’s the rundown:
When using Lumen
1. Enable distance fields
2. Enable Virtual Shadow Maps
3. Recommend Lumen Reflections with Screen Traces.
When not using Lumen
1. Use Screen Space Global Illumination
2. Use Screen Space Reflections if you must have reflections on movable objects, but otherwise try to not use SSR at all.
3. Use copious amounts of spherical reflection captures. They’re free.
4. Use planar reflections for really reflective surfaces if you can limit what it renders. Also great if you must have a mirror effect.
And I didn’t even get into ambient occlusion.
What is ambient occlusion? It’s just that small recesses, cracks, insets, etc. are darker than surrounding areas. Probably easier to see with an example.
This is a display of ambient occlusion. So you can see the areas between the rocks that make up each step is darker. You can also see the area on the gate where the bars intersect is darker as the light has more difficulty getting in those corners. The entire scene will be made darker as indicated.
In the following image, AO is on the left. No AO on the right. You can see that it adds more details and makes the scene look more natural.
Ambient occlusion is too big a topic. For simplicity, I’d recommend just turning on screen space ambient occlusion. This works with and without Lumen. Lumen does its own ambient occlusion, but I find the screen space version looks richer and more detailed. Note that just because the ambient occlusion view shows all white with Lumen doesn’t mean there is no AO. It’s just that Lumen does its own thing. Perhaps a future version will show Lumen AO. And for objects further out, you can also use distance field AO.
You can also have AO directly in your mesh’s material. There are tools in Unreal Engine to bake AO to a texture so you can use it in your material. Both Lumen and non lumen lighting will use material AO. In my game, when the towers lift out of the floor, the yellow pit is drawn using baked AO. The reason is that light can’t get down there. It’s below ground and the yellow pit is drawn in the translucent pass, so lighting doesn’t work well there anyhow. By baking AO, it looks like it has proper lighting.
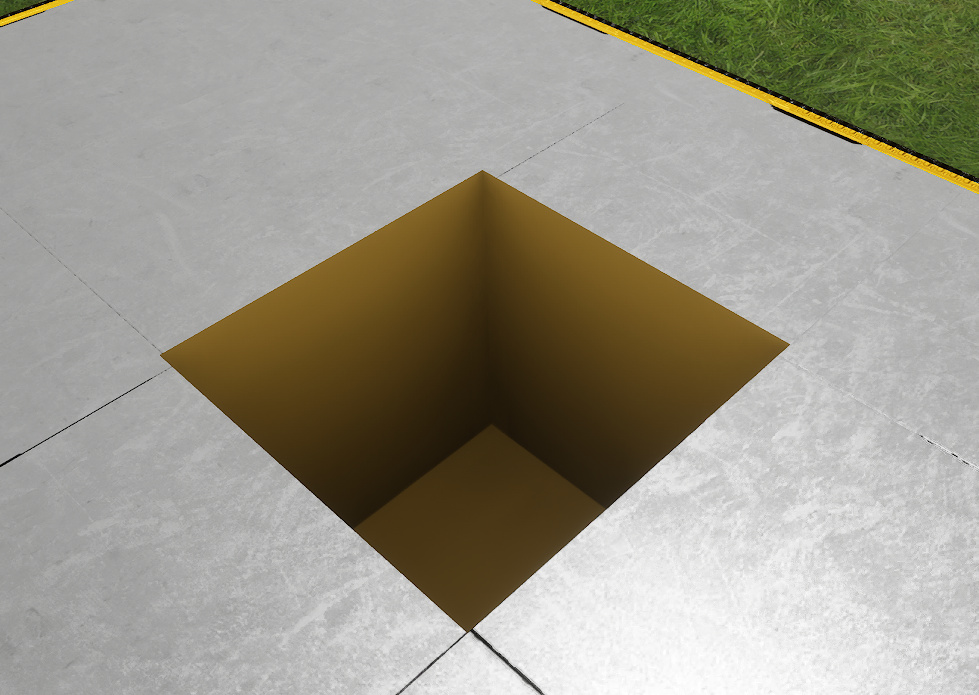
There is no lighting in the pit. It’s all done with an ambient occlusion texture in the material. A small detail. Yet one that adds a bit more depth 🙂
That’s it for now.
***UPDATE***
I learned a few more things about shadows. Virtual Shadow Maps were created specifically for Nanite. But they can be used with non Nanite meshes as well. Still, the developers at Epic decided that if you turn off Nanite in the project settings, then you can’t use Virtual Shadow Maps either despite selecting it. After turning Nanite on, I got at least a 15 fps drop in my scene. That is a huge hit. The alternative is to go back to cascade shadow maps. These don’t look as good, but honestly, it’s not that different. The only issue with Cascade Shadow Maps is that you have to tweak the settings a lot more to get something you like. Oh, and I said earlier that Lumen requires VSM. It does not.